120 lines
4.0 KiB
Markdown
120 lines
4.0 KiB
Markdown
> **Note:** This is an **optional** step and is required only when working with email workflows
|
|
|
|
- [Introduction](#introduction)
|
|
- [Installing MailHog](#installing-mailhog)
|
|
- [Using MailHog](#using-mailhog)
|
|
- [Useful Links](#useful-links)
|
|
|
|
## Introduction
|
|
|
|
Some email workflows, like updating a user's email, requires the back-end api-server to send outgoing emails. MailHog is an alternative to using an email service provider to send actual email messages. It is a developer tool for email testing that will catch the email messages sent by your freeCodeCamp instance.
|
|
|
|
## Installing MailHog
|
|
|
|
MailHog can be installed on macOS, Windows and Linux or used via Docker
|
|
|
|
<details><summary>Installing MailHog with Docker</summary>
|
|
|
|
If you have Docker installed then you can use
|
|
|
|
```bash
|
|
docker run -d --name mailhog --network host --rm mailhog/mailhog
|
|
```
|
|
|
|
to start MailHog in the background and
|
|
|
|
```bash
|
|
docker stop mailhog
|
|
```
|
|
|
|
to stop it.
|
|
|
|
When the installation completes, you can start [using MailHog](#using-mailhog).
|
|
</details>
|
|
|
|
<details><summary>Installing MailHog on macOS</summary>
|
|
|
|
Install MailHog on macOS with [Homebrew](https://brew.sh/):
|
|
|
|
```bash
|
|
brew install mailhog
|
|
brew services start mailhog
|
|
```
|
|
|
|
The above commands will start a mailhog service in the background.
|
|
|
|
When the installation completes, you can start [using MailHog](#using-mailhog).
|
|
</details>
|
|
|
|
<details><summary>Installing MailHog on Windows</summary>
|
|
|
|
Download the latest version of MailHog from [MailHog's official repository](https://github.com/mailhog/MailHog/releases). Locate and click on the link for your Windows version (32 or 64 bit) and a .exe file will be downloaded to your computer.
|
|
|
|
When the download completes, click to open the file. A Windows firewall notification may appear, requesting access permission for MailHog. A standard Windows command line prompt will open where MailHog will be running once firewall access is granted.
|
|
|
|
Close MailHog by closing the command prompt window. To start MailHog again, click on the MailHog executable (.exe) file that was downloaded initially - it is not necessary to download a new MailHog installation file.
|
|
|
|
Start [using MailHog](#using-mailhog).
|
|
</details>
|
|
|
|
<details><summary>Installing MailHog on Linux</summary>
|
|
|
|
First, install [Go](https://golang.org).
|
|
|
|
Run the following commands to install GO on Debian-based systems like Ubuntu and Linux Mint.
|
|
|
|
```bash
|
|
sudo apt-get install golang
|
|
```
|
|
|
|
Run the following commands to install GO on RPM-based systems like CentOS, Fedora, Red Hat Linux, etc.
|
|
|
|
```bash
|
|
sudo dnf install golang
|
|
```
|
|
|
|
Alternatively, run the following commands to install GO.
|
|
|
|
```bash
|
|
sudo yum install golang
|
|
```
|
|
|
|
Now set the path for Go with the following commands.
|
|
|
|
```bash
|
|
echo "export GOPATH=$HOME/go" >> ~/.profile
|
|
echo 'export PATH=$PATH:/usr/local/go/bin:$GOPATH/bin' >> ~/.profile
|
|
source ~/.profile
|
|
```
|
|
|
|
Finally, enter the commands below to install and run MailHog.
|
|
|
|
```bash
|
|
go get github.com/mailhog/MailHog
|
|
sudo cp /home/$(whoami)/go/bin/MailHog /usr/local/bin/mailhog
|
|
mailhog
|
|
```
|
|
|
|
Start [using MailHog](#using-mailhog).
|
|
</details>
|
|
|
|
## Using MailHog
|
|
|
|
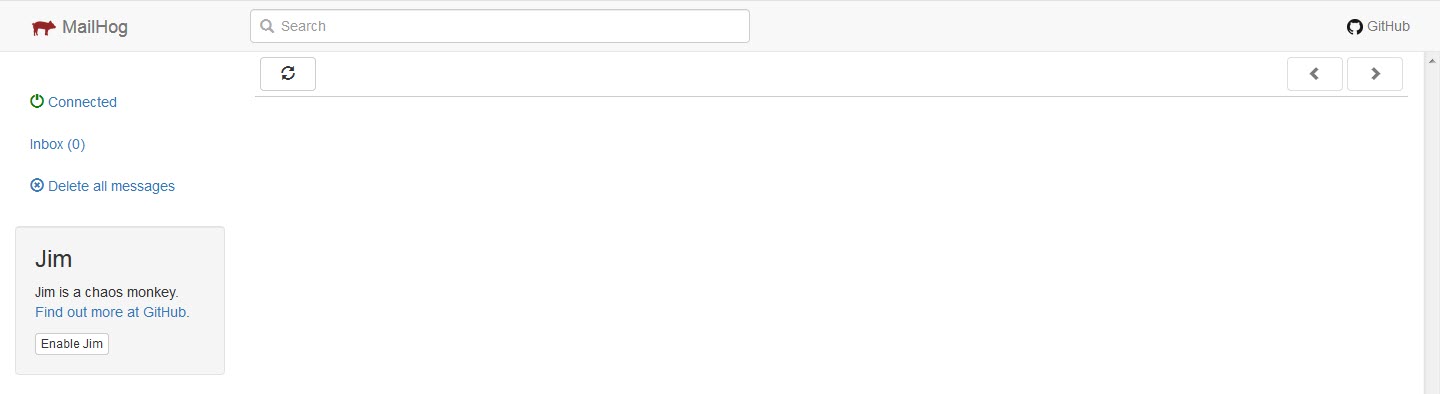
Open a new browser tab or window and navigate to [http://localhost:8025](http://localhost:8025) to open your MailHog inbox when the MailHog installation has completed and MailHog is running. The inbox will appear similar to the screenshot below.
|
|
|
|
|
|
|
|
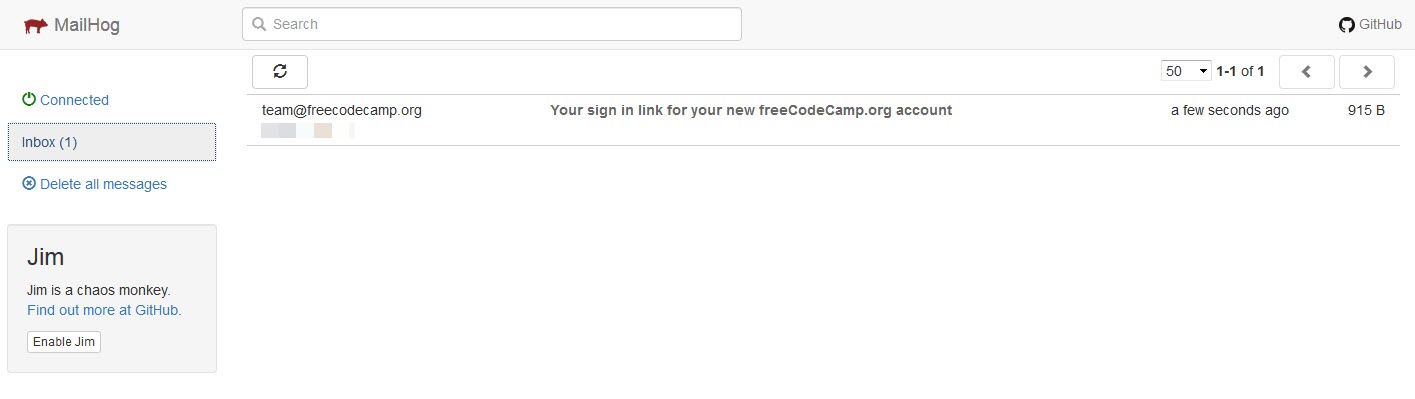
Emails sent by your freeCodeCamp installation will appear as below
|
|
|
|
|
|
|
|
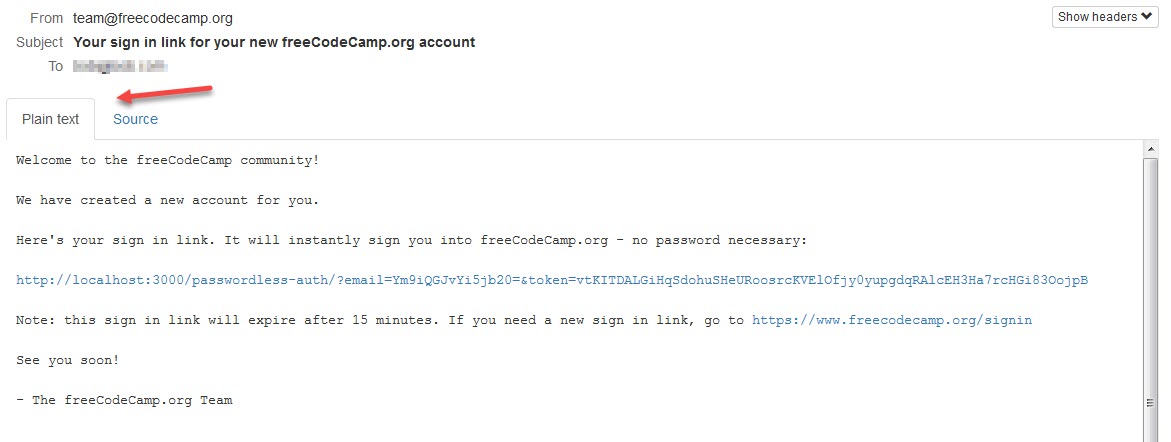
Two tabs that allow you to view either plain text or source content will be available when you open a given email. Ensure that the plain text tab is selected as below.
|
|
|
|
|
|
|
|
All links in the email should be clickable and resolve to their URL.
|
|
|
|
## Useful Links
|
|
|
|
- Check out the [MailHog](https://github.com/mailhog/MailHog) repository for further information related to MailHog. Additional information is also available regarding custom MailHog configurations.
|