191 lines
6.8 KiB
Markdown
191 lines
6.8 KiB
Markdown
---
|
|
title: Guide to Build a Sliding Image Gallery
|
|
---
|
|
This tutorial will walk you through building an image slider using the <a href='https://jquery.com/' target='_blank' rel='nofollow'>jQuery</a> library.
|
|
|
|
[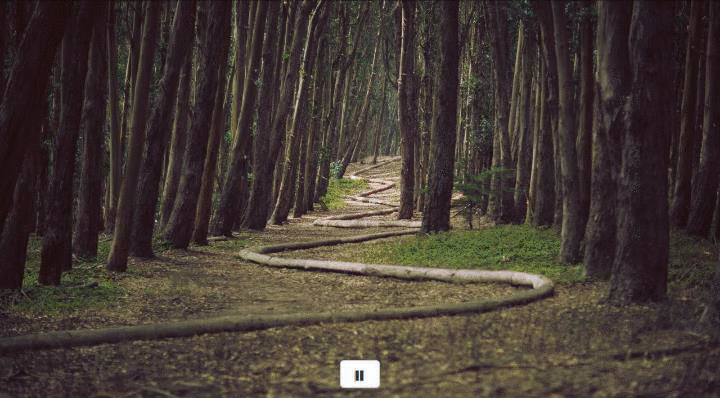](https://codepen.io/atjonathan/pen/BKMxxq)
|
|
|
|
This tutorial will have four parts:
|
|
- [HTML](#html)
|
|
- [SCSS](#scss)
|
|
- [JS](#js)
|
|
- [References](#references)
|
|
|
|
## HTML
|
|
|
|
We will be using <a href='http://getbootstrap.com/' target='_blank' rel='nofollow'>Bootstrap</a> for this tutorial to keep things looking good, without spending a lot of time.
|
|
|
|
Our structure will be as follows:
|
|
|
|
<div class="container">
|
|
|
|
<!-- The wrapper for our slider -->
|
|
<div class="slider">
|
|
<ul class="slides"><!-- Each image will be inside this unordered list --></ul>
|
|
</div>
|
|
|
|
<div class="buttons"><!-- Pause and play buttons will go in here --></div>
|
|
|
|
</div>
|
|
|
|
Inside our `ul` with the class of `slides` we will have the following:
|
|
|
|
<li class="slide"><img src="#" /></li>
|
|
<li class="slide"><img src="#" /></li>
|
|
<li class="slide"><img src="#" /></li>
|
|
<li class="slide"><img src="#" /></li>
|
|
<li class="slide"><img src="#" /></li>
|
|
|
|
Inside our `.buttons` class you should have the following:
|
|
|
|
<button type="button" class="btn btn-default pause">
|
|
<span class="glyphicon glyphicon-pause"></span>
|
|
</button>
|
|
<button type="button" class="btn btn-default play">
|
|
<span class="glyphicon glyphicon-play"></span>
|
|
</button>
|
|
|
|
Here is an example of what your `html` should look like:
|
|
|
|
> Note: You should replace the image `src` attribute with your own content.
|
|
|
|
<div class="container">
|
|
|
|
<div class="slider">
|
|
<ul class="slides">
|
|
<li class="slide"><img src="https://unsplash.it/1280/720/?image=120" /></li>
|
|
<li class="slide"><img src="https://unsplash.it/1280/720/?image=70" /></li>
|
|
<li class="slide"><img src="https://unsplash.it/1280/720/?image=50" /></li>
|
|
<li class="slide"><img src="https://unsplash.it/1280/720/?image=170" /></li>
|
|
<li class="slide"><img src="https://unsplash.it/1280/720/?image=190" /></li>
|
|
</ul>
|
|
</div>
|
|
|
|
<div class="buttons">
|
|
<button type="button" class="btn btn-default pause">
|
|
<span class="glyphicon glyphicon-pause"></span>
|
|
</button>
|
|
<button type="button" class="btn btn-default play">
|
|
<span class="glyphicon glyphicon-play"></span>
|
|
</button>
|
|
</div>
|
|
|
|
</div>
|
|
|
|
## SCSS
|
|
|
|
We are using <a href='http://sass-lang.com/' target='_blank' rel='nofollow'>Sass</a> and the SCSS syntax so we can nest and use variables 
|
|
|
|
We can use the following SCSS to define our styling:
|
|
|
|
// Variables
|
|
$width: 720px;
|
|
|
|
.slider {
|
|
width: $width;
|
|
height: 400px;
|
|
overflow: hidden;
|
|
margin: 0 auto;
|
|
text-align: center;
|
|
|
|
.slides {
|
|
display: block;
|
|
width: 6000px;
|
|
height: 400px;
|
|
margin: 0;
|
|
padding: 0;
|
|
}
|
|
|
|
.slide {
|
|
float: left;
|
|
list-style-type: none;
|
|
width: $width;
|
|
height: 400px;
|
|
|
|
img {
|
|
width: 100%;
|
|
height: 100%;
|
|
}
|
|
}
|
|
}
|
|
|
|
.buttons {
|
|
margin: 0;
|
|
width: $width;
|
|
position: relative;
|
|
top: -40px;
|
|
margin: 0 auto;
|
|
|
|
.play {
|
|
display: none;
|
|
}
|
|
|
|
.btn {
|
|
display: flex;
|
|
margin: 0 auto;
|
|
text-align: center;
|
|
}
|
|
}
|
|
|
|
## JS
|
|
|
|
#### Variables
|
|
|
|
_In the following code snippet, we define variables used later in our code._
|
|
|
|
var animationSpeed = 1000; // How quickly the next slide animates.
|
|
var pause = 3000; // The pause between each slide.
|
|
|
|
We will use a blank variable where we will call the `setInterval` method:
|
|
|
|
var interval;
|
|
|
|
#### Animation We will wrap our slider animations inside a function:
|
|
|
|
function startSlider() {}
|
|
|
|
We are using the `setInterval()` native JavaScript method to automate the contents of the function on a time based trigger.
|
|
|
|
interval = setInterval(function() {}, pause);
|
|
|
|
We use the `pause` variable to see how many milliseconds to wait before calling the function again. Read more on the native `setInterval` method here: https://developer.mozilla.org/en-US/docs/Web/API/WindowTimers/setInterval. Inside our function we will use jQuery to fade between slides at the speed of the animationSpeed variable:
|
|
|
|
$('.slides > li:first')
|
|
.fadeOut(animationSpeed)
|
|
.next()
|
|
.fadeIn(animationSpeed)
|
|
.end()
|
|
.appendTo('.slides');
|
|
|
|
- We are targeting the first slide using `$('.slides > li:first')`. - `.fadeOut(animationSpeed)` will fade the first slide out and then using `.next()`, we move to the next slide. - Once we have moved to the next slide, we will fade it in: `.fadeIn(animationSpeed)`. - This sequence will continue until the last slide (`.end()`), then we stop the animation. We will now call the `startSlider` function to start the animation:
|
|
|
|
startSlider();
|
|
|
|
#### Play and Pause *This feature is optional, but quite easy to implement.* We will hide the play button, so we don't see both the play and pause buttons:
|
|
|
|
$('.play').hide(); // Hiding the play button.
|
|
|
|
We will now create our pause button (automatically shown on page load):
|
|
|
|
$('.pause').click(function() {
|
|
clearInterval(interval);
|
|
$(this).hide();
|
|
$('.play').show();
|
|
});
|
|
|
|
- We will call our function every time the pause button is clicked using jQuery. - We will remove the interval using the `clearInterval` method and using our `interval` variable as the parameter, indicating which interval to stop. - Because our slider is paused, we will hide the pause button using `$(this).hide();`. Note: we are using `this`, which will refer to what our parent is calling i.e. `.pause`. - We will then show our play button so the user can resume the animation: `$('.play').show();`. The following code sets up our play button (automatically hidden on page load):
|
|
|
|
$('.play').click(function() {
|
|
startSlider();
|
|
$(this).hide();
|
|
$('.pause').show();
|
|
});
|
|
|
|
* We will call our function every time the play button is clicked using jQuery.
|
|
* We will start or restart the interval using the `startSlider` function.
|
|
* Because our slider is currently playing, we will hide the play button using `$(this).hide();`. Note: we are using `this`, which will refer to what our parent is calling i.e. `.play`.
|
|
* We will then show our pause button so the user can stop the animation at will: `$('.pause').show();`.
|
|
|
|
## References
|
|
|
|
* Checkout the source code and example on <a href='https://codepen.io/atjonathan/pen/BKMxxq' target='_blank' rel='nofollow'>CodePen</a> for this tutorial. |