25 KiB
Segui queste linee guida per impostare freeCodeCamp localmente nel tuo sistema. Te lo raccomandiamo caldamente se desideri contribuire regolarmente.
Alcuni di questi flussi di lavoro contributivi – come la correzione di bug nel codebase o nel curriculum – hanno bisogno di eseguire freeCodeCamp localmente sul computer.
[!TIP] Se non sei interessato a configurare freeCodeCamp localmente, considera di utilizzare Gitpod, un ambiente di sviluppo online gratuito.
(Avvia un ambiente di sviluppo ready-to-code per freeCodeCamp nel tuo browser.)

Come preparare la macchina locale
Inizia installando i prerequisiti software per il tuo sistema operativo.
Sosteniamo principalmente lo sviluppo su sistemi Linux e basati su Unix. Il nostro staff e i collaboratori della community lavorano regolarmente con il codebase utilizzando strumenti installati su Ubuntu e macOS.
Supportiamo anche Windows 10 via WSL2, che puoi preparare leggendo questa guida.
Alcuni membri della comunità sviluppano anche su Windows 10 nativamente con Git per Windows (Git Bash) e altri strumenti installati su Windows. Al momento non disponiamo di un supporto ufficiale per una tale configurazione, consigliamo invece di utilizzare WSL2.
Prerequisites:
| Prerequisito | Versione | Note |
|---|---|---|
| Node.js | 14.x |
Usiamo la versione "Active LTS", Vedi LTS Schedule. |
| npm (viene fornito in bundle con node) | 6.x |
npm non ha una versione LTS, usiamo la versione in bundle con Node.js Active LTS. |
| Server Community MongoDB | 4.0.x |
- |
[!ATTENTION] Se hai una versione diversa, per favore installa la versione raccomandata. Possiamo supportare solo i problemi di installazione per le versioni consigliate. Vedi risoluzione dei problemi per i dettagli.
If Node.js is already installed on your machine, run the following commands to validate the versions:
node -v
npm -v
[!TIP] Consigliamo vivamente di aggiornare le ultime versioni stabili del software sopra elencato, note anche come versioni con supporto a lungo termine (LTS).
Once you have the prerequisites installed, you need to prepare your development environment. This is common for many development workflows, and you will only need to do this once.
Follow these steps to get your development environment ready:
-
Installa Git o il tuo client Git preferito, se non lo hai già. Aggiornamento alla versione più recente; la versione fornita con il tuo sistema operativo potrebbe essere obsoleta.
-
(Facoltativo ma consigliato) Imposta una chiave SSH per GitHub.
-
Installa un editor di codice a tua scelta.
Consigliamo vivamente di utilizzare Visual Studio Code o Atom. Questi sono editor di codice ottimi, grauiti e open source.
-
Imposta il linting per il tuo editor di codice.
Dovresti avere ESLint in esecuzione nel tuo editor, ed esso metterà in evidenza tutto ciò che non è conforme alla Guida di stile JavaScript di freeCodeCamp.
[!TIP] Per favore non ignorare alcun errore di linting. Essi sono destinati ad aiutarti e a garantire un codice pulito e semplice.
Esegui il fork del repository su GitHub
Forking is a step where you get your own copy of freeCodeCamp's main repository (a.k.a repo) on GitHub.
This is essential, as it allows you to work on your own copy of freeCodeCamp on GitHub, or to download (clone) your repository to work on locally. Later, you will be able to request changes to be pulled into the main repository from your fork via a pull request (PR).
[!TIP] Il repository principale su
https://github.com/freeCodeCamp/freeCodeCampè spesso indicato come il repositoryupstream.Il tuo fork situato si
https://github.com/YOUR_USER_NAME/freeCodeCampè spesso chiamato il repositoryorigin.YOUR_USER_NAMEè sostituito dal tuo nome utente GitHub.
Follow these steps to fork the https://github.com/freeCodeCamp/freeCodeCamp repository:
-
Vai al repository freeCodeCamp su GitHub: https://github.com/freeCodeCamp/freeCodeCamp
-
Fai clic sul pulsante "Fork" nell'angolo in alto a destra dell'interfaccia (Maggiori dettagli qui)
-
Dopo che è stato creato un fork del repository, sarai portato alla tua copia del repository di freeCodeCamp su
https://github.com/YOUR_USER_NAME/freeCodeCamp(YOUR_USER_NAMEè sostituito dal tuo nome utente GitHub.)
How to fork freeCodeCamp on GitHub (screenshot)

Clona il tuo fork da GitHub
Cloning is where you download a copy of a repository from a remote location that is either owned by you or by someone else. In your case, this remote location is your fork of freeCodeCamp's repository that should be available at https://github.com/YOUR_USER_NAME/freeCodeCamp. (YOUR_USER_NAME would be replaced with your GitHub user name.)
[!WARNING] Se stai lavorando su una Distro di Linux su WSL2, potresti avere problemi di performace e stabilità eseguendo il progetto in una cartella che è condivisa tra Windows e WSL2 (per esempio
/mnt/c/Users/). Quindi ti raccomandiamo di clonare il repo in una cartella che è usata principalmente dal Distro di Linux su WSL2 e non condivisa direttamente con Windows (per esempio~/PROJECTS/).Vedi questa issue su GitHub per ulterioni informazioni su questo problema.
Run these commands on your local machine:
-
Apri un terminale / prompt dei comandi / Shell nella directory dei progetti
cioè:
/yourprojectsdirectory/ -
Clona il tuo fork di freeCodeCamp, sostituendo
YOUR_USER_NAMEcon il tuo nome utente GitHubgit clone --depth=1 https://github.com/YOUR_USER_NAME/freeCodeCamp.git
This will download the entire freeCodeCamp repository to your projects directory.
Note: --depth=1 creates a shallow clone of your fork, with only the most recent history/commit.
Imposta la sincronizzazione dal genitore
Now that you have downloaded a copy of your fork, you will need to set up an upstream remote to the parent repository.
As mentioned earlier, the main repository is referred upstream repository. Your fork referred to as the origin repository.
You need a reference from your local clone to the upstream repository in addition to the origin repository. This is so that you can sync changes from the main repository without the requirement of forking and cloning repeatedly.
-
Cambia la directory nella nuova directory freeCodeCamp:
cd freeCodeCamp -
Aggiungi un riferimento remoto al repository freeCodeCamp principale:
git remote add upstream https://github.com/freeCodeCamp/freeCodeCamp.git -
Assicurati che la configurazione sia corretta:
git remote -vL'output dovrebbe apparire simile al seguente (sostituendo
YOUR_USER_NAMEcon il tuo username di GitHub):origin https://github.com/YOUR_USER_NAME/freeCodeCamp.git (fetch) origin https://github.com/YOUR_USER_NAME/freeCodeCamp.git (push) upstream https://github.com/freeCodeCamp/freeCodeCamp.git (fetch) upstream https://github.com/freeCodeCamp/freeCodeCamp.git (push)
Eseguire freeCodeCamp localmente
Now that you have a local copy of freeCodeCamp, you can follow these instructions to run it locally. This will allow you to:
- Vedere un'anteprima delle modifiche come apparirebbero sulla piattaforma di apprendimento.
- Lavorare su problemi e miglioramenti relativi all'interfaccia utente.
- Fare il debug e la correzione dei problemi con i server delle applicazioni e le app client.
If you do run into issues, first perform a web search for your issue and see if it has already been answered. If you cannot find a solution, please search our GitHub issues page for a solution and report the issue if it has not yet been reported.
And as always, feel free to ask questions on the 'Contributors' category on our forum or our chat server.
[!TIP] Puoi saltare l'esecuzione di freeCodeCamp localmente se stai semplicemente modificando i file. Per esempio, facendo un
rebase, o risolvendo dei conflitti dimerge.Puoi sempre tornare in seguito a questa parte della guida. Dovresti saltare questi step solo se non hai bisogno di eseguire le app sul tuo computer.
Configurare le dipendenze
Step 1: Set up the environment variable file
The default API keys and environment variables are stored in the file sample.env. This file needs to be copied to a new file named .env that is accessed dynamically during the installation step.
# Creare una copia del "sample.env" e denominarlo ".env".
# Popolarlo con le necessarie chiavi API e secrets:

# macOS / Linux
cp esempio. nv .env

# Windows
copy sample.env .env
The keys in the .env file are not required to be changed to run the app locally. You can leave the default values copied over from sample.env as-is.
[!TIP] Tieni a mente che se vuoi usare servizi come Auth0 o Algolia, dovrai ottenere delle API key per quei servizi per conto tuo e modificare il file
.envdi conseguenza.
Step 2: Install dependencies
This step will install the dependencies required for the application to run:
npm ci
Step 3: Start MongoDB and seed the database
Before you can run the application locally, you will need to start the MongoDB service.
[!NOTE] A meno che tu non abbia MongoDB in esecuzione in un setup differente dal default, l'URL salvato come
MONGOHQ_URLnel file.envdovrebbe andare bene. Se usi una configurazione personalizzata, modifica il valore come necessario.
Start the MongoDB server in a separate terminal:
-
Su macOS & Ubuntu:
mongod -
Su Windows, è necessario specificare il percorso completo dell'eseguibile
mongod"C:\Program Files\MongoDB\Server\3.6\bin\mongod"Assicurati di sostituire
3.6con la versione che hai installato
[!TIP] Puoi evitare di dover avviare MongoDB ogni volta se lo installi come servizio in background. Puoi saperne di più nella loro documentazione per il tuo sistema operativo
Next, let's seed the database. In this step, we run the below command that fills the MongoDB server with some initial data sets that are required by services. These include a few schemas, among other things.
npm run seed
Step 4: Start the freeCodeCamp client application and API server
You can now start up the API server and the client applications.
npm run develop
This single command will fire up all the services, including the API server and the client applications available for you to work on.
[!NOTE] Una volta pronto, apri un browser web e visita http://localhost:8000. Se l'app si carica, congratulazioni, sei a posto! Hai ora una copia dell'intera piattaforma di apprendimento di freeCodeCamp in esecuzione sul tuo computer.
[!TIP] Il server API serve le API su
http://localhost:3000. L'app Gatsby serve il client dell'applicazione suhttp://localhost:8000
Se visiti http://localhost:3000/explorer dovresti vedere le API disponibili.
Accedi con un utente locale
Your local setup automatically populates a local user in the database. Clicking the Sign In button will automatically authenticate you into the local application.
However, accessing the user portfolio page is a little tricky. In development, Gatsby takes over serving the client-side pages and hence you will get a 404 page for the user portfolio when working locally.
Simply clicking the "Preview Custom 404 Page" button will forward you to the correct page.
How to sign in when working locally (screenshot)
Apportare modifiche a livello locale
You can now make changes to files and commit your changes to your local clone of your fork.
Follow these steps:
-
Controlla di essere sul ramo
main:git statusDovresti ottenere un output come questo:
On branch main
Your branch is up-to-date with 'origin/main'.

niente da commit, directory di lavoro pulita
Se non sei sul ramo main o la directory su cui stai lavorando non è pulita, risolvi file e commit in sospeso e fai il checkout di
main:git checkout main -
Sincronizza il tuo ramo main locale con gli ultimi aggiornamenti dal ramo
maindell'upstream di freeCodeCamp:[!WARNING] Se hai delle pull request in sospeso fatte dal ramo
maindel tuo fork, le perderai alla fine di questi passaggi.Dovresti assicurarti che la tua pull request sia unita da un moderatore prima di eseguire questo passaggio. Per evitare questo scenario, dovresti sempre lavorare su un ramo che non sia
main.Questo passaggio sincronizzerà le ultime modifiche dal repository principale di freeCodeCamp. È importante che tu faccia un rebase del tuo ramo utilizzando l'ultima versione di
upstream/mainquanto più spesso possibile per evitare conflitti successivamente.Aggiorna la tua copia locale del repository upstream freeCodeCamp:
git fetch upstreamFai un hard reset del tuo ramo main con il ramo main di freeCodeCamp:
git reset --hard upstream/mainFai un push del ramo main al tuo origin per avere una cronologia pulita nel tuo fork su GitHub:
git push origin main --forcePuoi controllare che il tuo main attuale corrisponda con upstream/main facendo un diff:
git diff upstream/mainL'output risultante dovrebbe essere vuoto.
-
Crea un nuovo ramo:
Lavorare su un ramo separato per ogni problema ti aiuta a mantenere pulita la tua copia di lavoro locale. Non dovresti mai lavorare su
main. Questo sporcherebbe la tua copia di freeCodeCamp e potrebbe essere necessario ricominciare da capo con un nuovo clone o fork.Controlla di essere su
maincome spiegato in precedenza, e crea un ramo da lì:git checkout -b fix/update-guide-for-xyzIl nome del ramo dovrebbe iniziare con un
fix/,feat/,docs/, ecc. Evita di utilizzare i numeri delle issue nei rami. Tienili brevi, significativi e unici.Alcuni esempi di buoni nomi dei rami sono:
fix/update-challenges-for-react fix/update-guide-for-html-css fix/platform-bug-sign-in-issues feat/add-guide-article-for-javascript translate/add-spanish-basic-html -
Modifica le pagine e lavora sul codice nel tuo editor di testo preferito.
-
Una volta che sei soddisfatto delle modifiche, dovresti opzionalmente eseguire freeCodeCamp localmente per visualizzarle in anteprima.
-
Assicurati di correggere eventuali errori e controlla la formattazione delle modifiche.
-
Controlla e conferma i file che stai aggiornando:
git statusQuesto dovrebbe mostrare un elenco di file
unstagedche hai modificato.Su branch feat/documentation Il ramo è aggiornato con 'upstream/feat/documentation'. Changes were not staged for commit: (use "git add/rm <file>..." to update what will be committed) (use "git checkout -- <file>..." to discard changes in the working directory) modified: CONTRIBUTING.md modified: docs/README.md modified: docs/how-to-setup-freecodecamp-locally.md modified: docs/how-to-work-on-guide-articles.md ... -
Fai lo stage delle modifiche e crea un commit:
In questo passaggio, dovresti contrassegnare solo i file che hai modificato o aggiunto tu stesso. Se necessario è possibile eseguire un reset e risolvere i file che non hai intenzione di modificare.
git add path/to/my/changed/file.extOppure puoi aggiungere tutti i file
unstagedall'area di staging:git add .Solo i file che sono stati spostati nell'area di staging verranno aggiunti quando si effettua un commit.
git statusOutput:
On branch feat/documentation
Your branch is up to date with 'upstream/feat/documentation'.

Changes to be committed:
(use "git reset HEAD <file>..." to unstage)

    modified:   CONTRIBUTING.md
    modified:   docs/README.md
    modified:   docs/how-to-setup-freecodecamp-locally.md
    modified:   docs/how-to-work-on-guide-articles.md
Ora, è possibile eseguire il commit delle modifiche con un breve messaggio come questo:
git commit -m "fix: my short commit message"Alcuni esempi:
fix: update guide article for Java - for loop
feat: add guide article for alexa skills
Facoltativo:
Raccomandiamo caldamente di creare un messaggio di commit convenzionale. Questa è una buona pratica che vedrai su alcuni dei più popolari repository Open Source. Come sviluppatore, questo ti incoraggia a seguire le pratiche standard.
Alcuni esempi di messaggi di commit convenzionali sono:
fix: update HTML guide article
fix: update build scripts for Travis-CI
feat: add article for JavaScript hoisting
docs: update contributing guidelines
Mantieni questi messaggi brevi, non più di 50 caratteri. È sempre possibile aggiungere ulteriori informazioni nella descrizione del messaggio di commit.
Questo non richiede tempo aggiuntivo rispetto a un messaggio non convenzionale come 'fupdate file' o 'add index.md'
Puoi saperne di più sul perché dovresti usare i commit convenzionali qui.
-
Se ti accorgi di dover modificare un file o aggiornare il messaggio del commit dopo aver fatto un commit puoi farlo dopo aver modificato i file con:
git commit --amendQuesto aprirà un editor di testo predefinito come
nanoovidove potrai modificare il titolo del messaggio di commit e aggiungere/modificare la descrizione. -
Successivamente, è possibile inviare le modifiche al fork:
git push origin branch/name-here
Proporre una Pull Request (PR)
After you've committed your changes, check here for how to open a Pull Request.
Comandi rapidi
A quick reference to the commands that you will need when working locally.
| comando | descrizione |
|---|---|
npm ci |
Installa / reinstalla tutte le dipendenze e avvia i diversi servizi. |
npm run seed |
Analizza tutti i file di markdown della sfida e li inserisce in MongoDB. |
npm run develop |
Avvia il server API freeCodeCamp e le applicazioni client. |
npm run storybook |
Esegui Storybook per sviluppo dei componenti di library. |
npm test |
Esegui tutti i test JS del sistema inclusi client, server, link e test delle sfide. |
npm run test:client |
Esegui la test suite del client. |
npm run test:curriculum |
Esegui la test suite del curriculum. |
npm run test:curriculum --block='Basic HTML and HTML5' |
Esegui i test di uno specifico blocco. |
npm run test:curriculum --superblock='responsive-web-design' |
Esegui i test di uno specifico superblocco. |
npm run test-curriculum-full-output |
Esegui la suite di test del curriculum, senza arrestarsi dopo il primo errore |
npm run test:server |
Esegui la suite di test del server. |
npm run e2e |
Esegui i test di Cypress end to end. |
npm run clean |
Disistalla tutte le dipendenze e pulisce la cache. |
Risoluzione Dei Problemi
Problemi con l'installazione dei prerequisiti raccomandati
We regularly develop on the latest or most popular operating systems like macOS 10.15 or later, Ubuntu 18.04 or later, and Windows 10 (with WSL2).
It is recommended to research your specific issue on resources such as Google, Stack Overflow, and Stack Exchange. There is a good chance that someone has faced the same issue and there is already an answer to your specific query.
If you are on a different OS and/or are still running into issues, see getting help.
Warning
Per favore evita di creare issue su GitHub per problemi con i prerequisiti. Sono al di fuori dell'ambito di questo progetto.
Problemi con UI, Font, errori di build, ecc.
If you face issues with the UI, Fonts or see builds errors a cleanup can be useful:
npm run clean
npm ci
npm run seed
npm run develop
OR
Use the shortcut
npm run clean-and-develop
If you continue to face issues with the build, cleaning up the workspace is recommend.
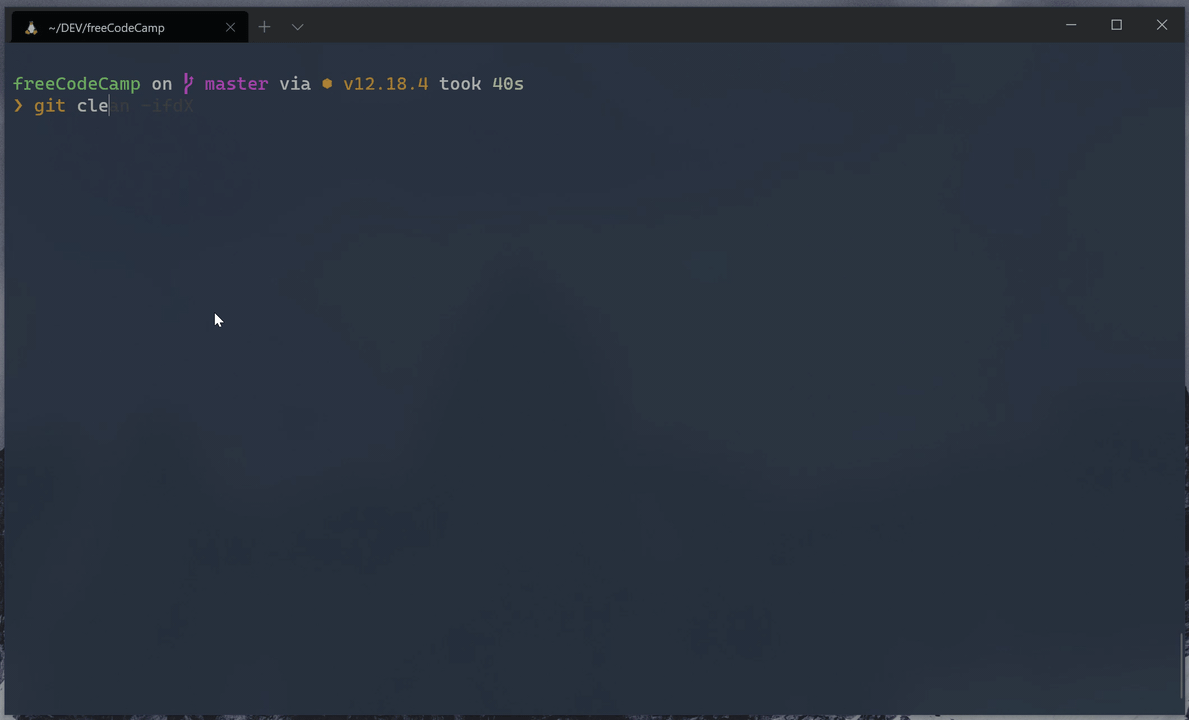
Use git clean in interactive mode:
git clean -ifdX
How to clean git untracked files (screenshot)
Problemi con API, logic, invio delle sfide, ecc.
If you can't sign in, and instead you see a banner with an error message that it will be reported to freeCodeCamp, please double-check that your local port 3000 is not in use by a different program.
On Linux / macOS / WSL on Windows - From Terminal:
netstat -a | grep "3000"

tcp4    0   0    0.0.0.0:3000           DESKTOP      LISTEN
On Windows - From Elevated PowerShell:
netstat -ab | Select-String "3000"

TCP    0.0.0.0:3000           DESKTOP      LISTENING
Problemi nell'installazione delle dipendenze
If you get errors while installing the dependencies, please make sure that you are not in a restricted network or your firewall settings do not prevent you from accessing resources.
The first time setup can take a while depending on your network bandwidth. Be patient, and if you are still stuck we recommend using GitPod instead of an offline setup.
Ottenere Aiuto
If you are stuck and need help, feel free to ask questions on the 'Contributors' category on our forum or the contributors chat room.
There might be an error in the console of your browser or in Bash / Terminal / Command Line that will help identify the problem. Provide this error message in your problem description so others can more easily identify the issue and help you find a resolution.