4.2 KiB
Observação: esta é uma etapa opcional e é necessária somente quando trabalhando com fluxos de e-mail
Introdução
Alguns fluxos de e-mail, como atualizar o e-mail de um usuário, requerem que o servidor da api do back-end envie e-mails de saída. O MailHog é uma alternativa para quem não quer usar um provedor de serviços de e-mail para enviar mensagens de e-mail de verdade. Ele é uma ferramenta de desenvolvedores para o teste de e-mails que receberá mensagens de e-mail de sua instância do freeCodecamp.
Instalando o MailHog
O MailHog pode ser instalado no macOS, Windows e Linux ou usado via Docker
Instalando o MailHog no Docker
Se você tem o Docker instalado, então você pode usar
docker run -d --name mailhog --network host --rm mailhog/mailhog
para iniciar o MailHog em segundo plano e
docker stop mailhog
para para-lo.
Quando a instalação for concluída, você pode começar a usar o MailHog.
Installing MailHog on macOS
Install MailHog on macOS with Homebrew:
brew install mailhog
brew services start mailhog
The above commands will start a mailhog service in the background.
When the installation completes, you can start using MailHog.
Installing MailHog on Windows
Download the latest version of MailHog from MailHog's official repository. Locate and click on the link for your Windows version (32 or 64 bit) and a .exe file will be downloaded to your computer.
When the download completes, click to open the file. A Windows firewall notification may appear, requesting access permission for MailHog. A standard Windows command line prompt will open where MailHog will be running once firewall access is granted.
Close MailHog by closing the command prompt window. To start MailHog again, click on the MailHog executable (.exe) file that was downloaded initially - it is not necessary to download a new MailHog installation file.
Start using MailHog.
Installing MailHog on Linux
First, install Go.
Run the following commands to install GO on Debian-based systems like Ubuntu and Linux Mint.
sudo apt-get install golang
Run the following commands to install GO on RPM-based systems like CentOS, Fedora, Red Hat Linux, etc.
sudo dnf install golang
Alternatively, run the following commands to install GO.
sudo yum install golang
Now set the path for Go with the following commands.
echo "export GOPATH=$HOME/go" >> ~/.profile
echo 'export PATH=$PATH:/usr/local/go/bin:$GOPATH/bin' >> ~/.profile
source ~/.profile
Finally, enter the commands below to install and run MailHog.
go get github.com/mailhog/MailHog
sudo cp /home/$(whoami)/go/bin/MailHog /usr/local/bin/mailhog
mailhog
Start using MailHog.
Usando o MailHog
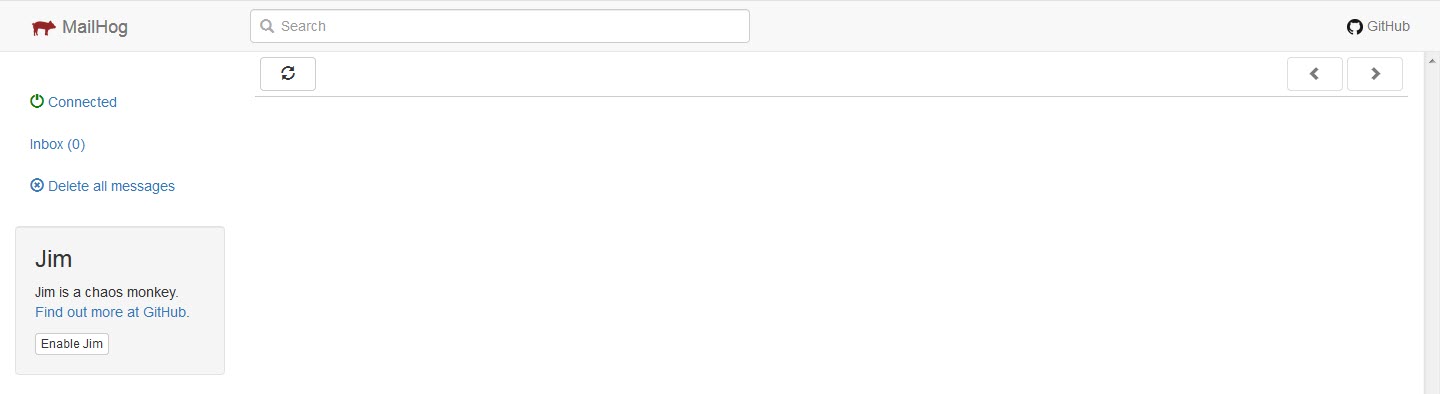
Open a new browser tab or window and navigate to http://localhost:8025 to open your MailHog inbox when the MailHog installation has completed and MailHog is running. The inbox will appear similar to the screenshot below.
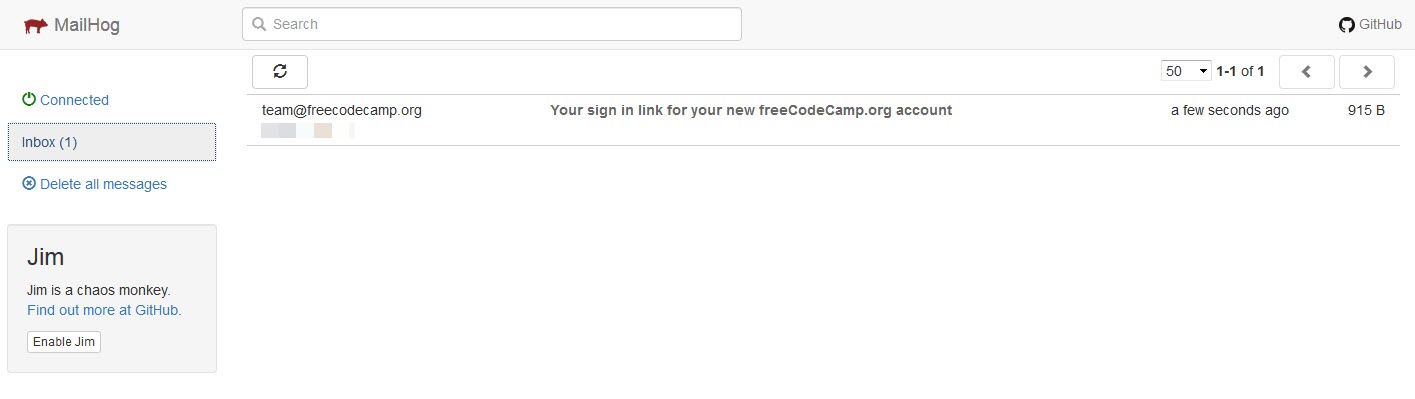
Emails sent by your freeCodeCamp installation will appear as below
Two tabs that allow you to view either plain text or source content will be available when you open a given email. Ensure that the plain text tab is selected as below.
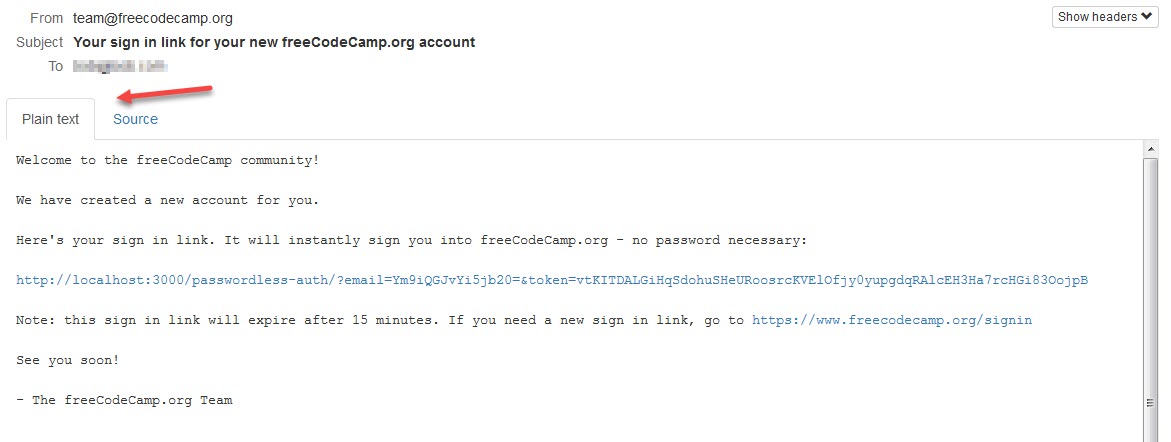
All links in the email should be clickable and resolve to their URL.
Links úteis
- Confira o repositório MailHog para mais informações relacionadas ao MailHog. Informações adicionais também estão disponíveis sobre configurações personalizadas do MailHog.